
Do you have a minute? Let’s learn.
Today is about spoken text.
Highlight text and your Apple device can read it out loud.
You will need; your Apple device and access to Settings (iOS) or System Preferences (OS).

.
Sketch Note Directions
ConnectiPad2Mac by ConnectiPad2Mac is licensed under a Creative Commons Attribution-NonCommercial-ShareAlike 4.0 International License.

Written Directions
What…
Turn on Spoken Content
Why…
Hear what you write. Hear what you read. Using Spoken Content to proof read emails, papers, and anything you write can be powerful. Sometimes listening is a much needed change and sometimes hearing improves understanding.
How…
Turn it on following the directions and then simply highlight words and tap Speak on the iPad, Control click on the Mac (or use the Keyboard Shortcut you set.)
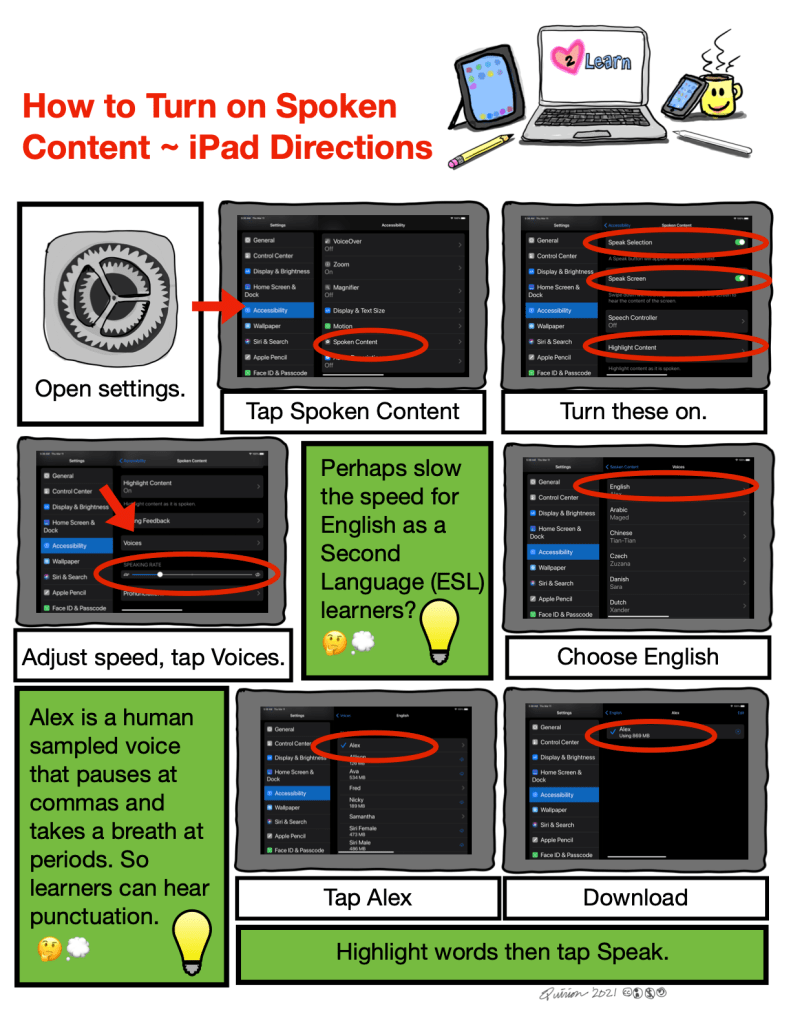
On the iPad or iPhone
Open Settings, Navigate down on the left to Accessibility.
On the right tap Spoken Content.
Toggle the button to the on position next to Speak Selection. (I also turn on Speak Screen and Highlight Content.)
Tap Voices
Tap English
Tap Alex (You may have to tap the cloud to download the voice.)
Tap the back arrow at the top and notice under Voices there is a slider, Speaking Rate.
Adjust this to your comfort. ESL learners may benefit with a slower speaking speed.
There are other languages and voices and you can try any and all of them. This is just directions to set up an English, human sampled voice. There are new AI voices coming and they may be even better in the future so keep exploring.
On the Mac
Open System Preferences
Click Accessibility
On the left find Spoken Content and Click on it.
On the right customize.
===========================================
