Do you have a minute? Let’s learn.
Today is about connecting your iPad to your Mac.
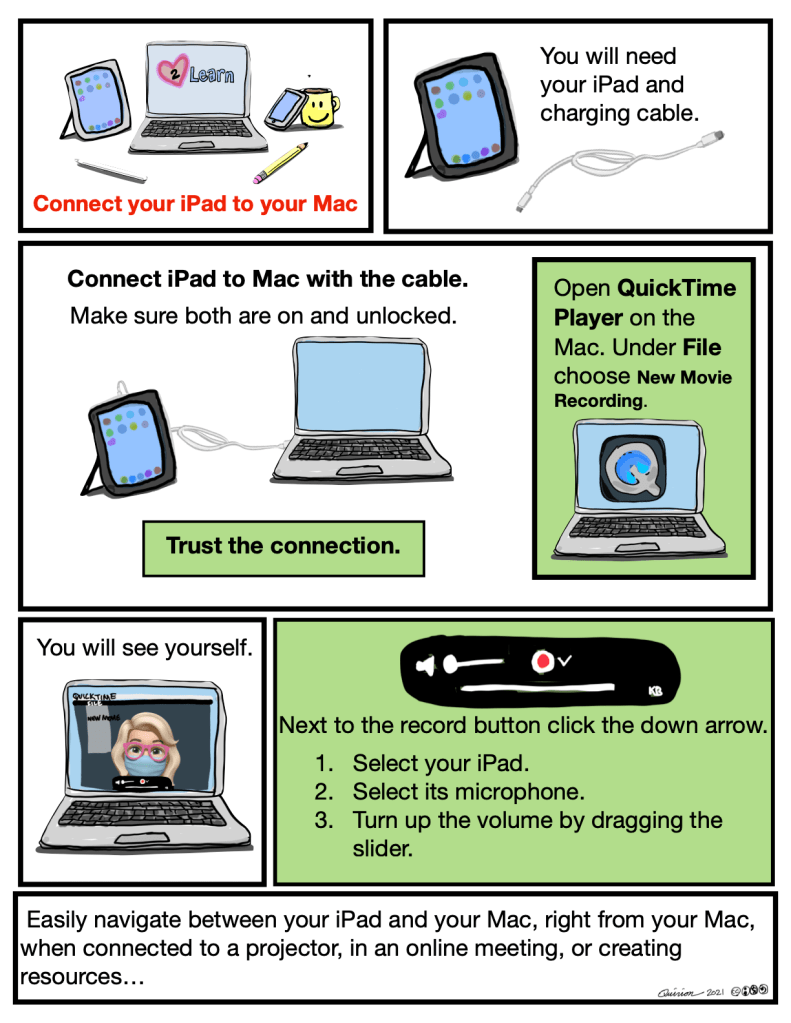
Share your Mac or your iPad screen with only one login to your online session. This is great if you want a quick whiteboard to demonstrate with or you need to show others how to use an app.
You will need; your iPad, its charging cable, and your MacBook.

.
Sketch Note Directions
ConnectiPad2Mac by ConnectiPad2Mac is licensed under a Creative Commons Attribution-NonCommercial-ShareAlike 4.0 International License.
Written Directions
What—
Connecting your iPad and Mac
Why—
Zoom, Teams, Webex,… any online meeting that allows screen sharing, also this can be used when projecting in a classroom or boardroom. Easy whiteboard for idea generating, drawing, note taking…
How—
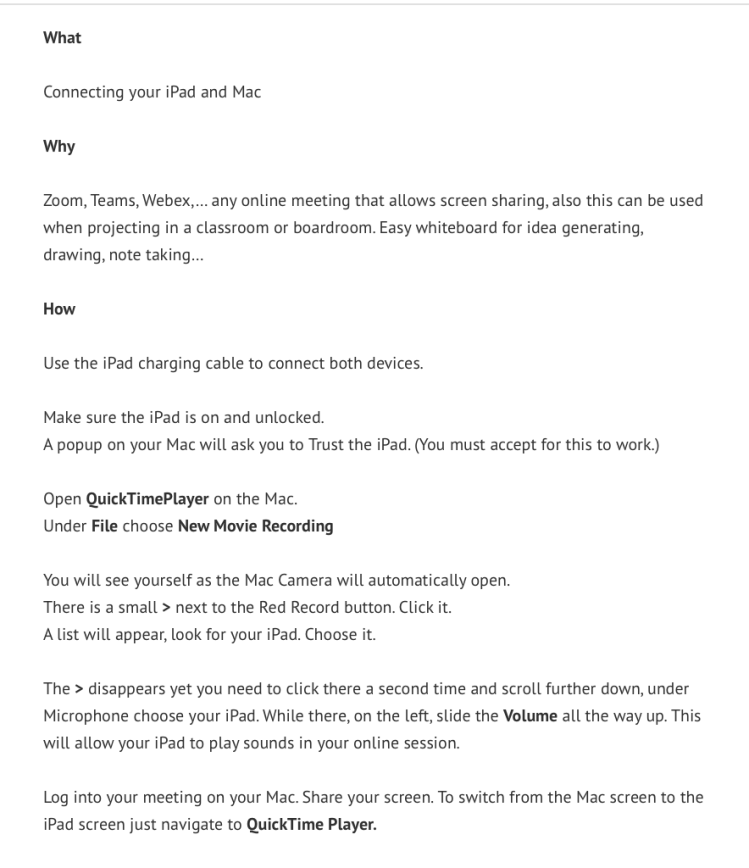
Use the iPad charging cable to connect both devices.
Make sure the iPad is on and unlocked.
A popup on your Mac will ask you to Trust the iPad. (You must accept for this to work.)
Open QuickTimePlayer on the Mac.
Under File choose New Movie Recording
You will see yourself as the Mac Camera will automatically open.
There is a small > next to the Red Record button. Click it.
A list will appear, look for your iPad. Choose it.
The > disappears yet you need to click there a second time and scroll further down, under Microphone choose your iPad. While there, on the left, slide the Volume all the way up. This will allow your iPad to play sounds in your online session.
Log into your meeting on your Mac. Share your screen. To switch from the Mac screen to the iPad screen just navigate to QuickTime Player.
===========================================
If having trouble quit QuickTime and make sure the iPad is connected and unlocked then open QuickTime and try again.
